This tutorial provides the steps to set up a carousel with dynamic post-specific content in a lightbox using OxyExtras.
We shall set up a text link inside an Oxygen Builder‘s Repeater which when clicked displays the post title and the value of a custom field inside a Lightbox for that item (post) in the carousel.
OxyExtras components used: Carousel Builder, Lightbox.
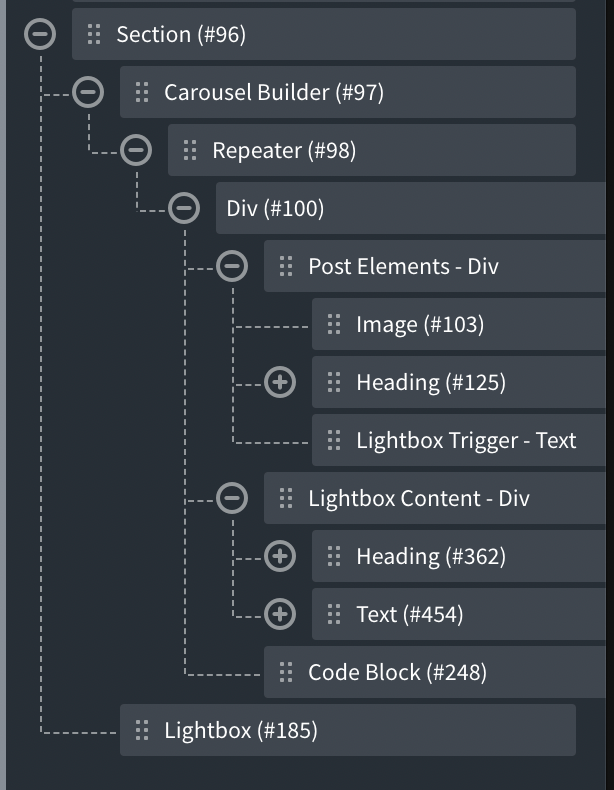
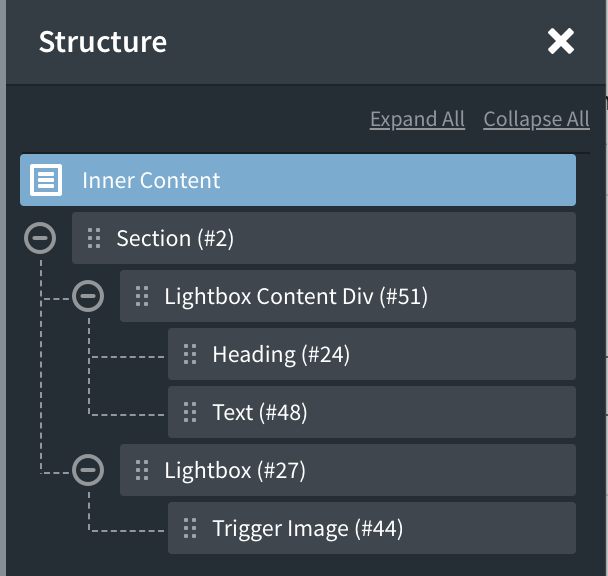
By the end of this tutorial your page’s structure should be something like this:
In the Oxygen editor, add a Section.
If you have not already, enable Carousel Builder and Lightbox in OxyExtras’ settings.
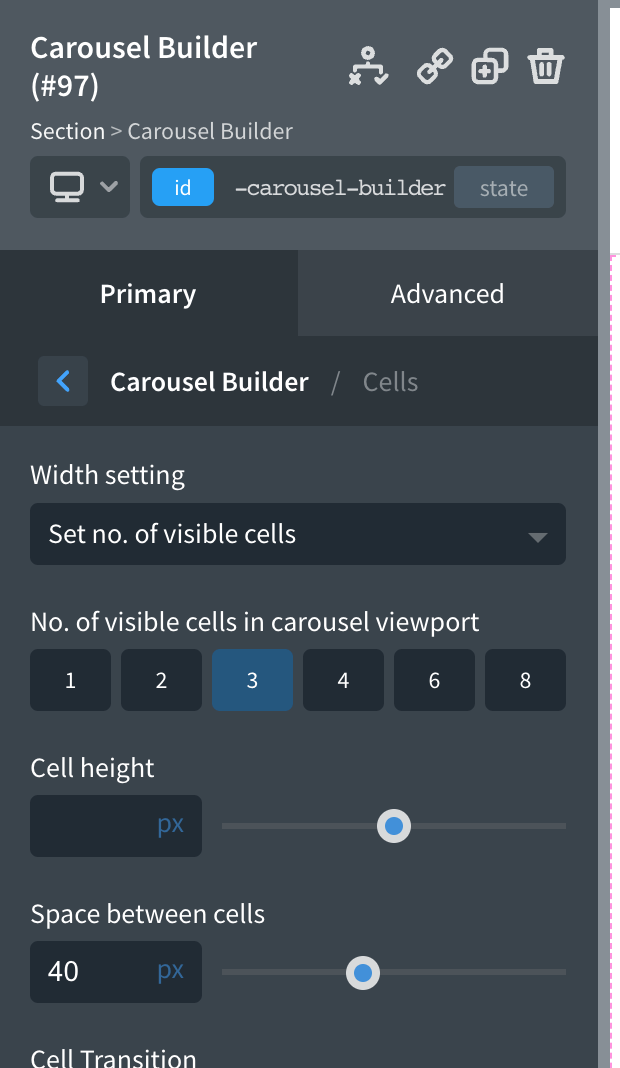
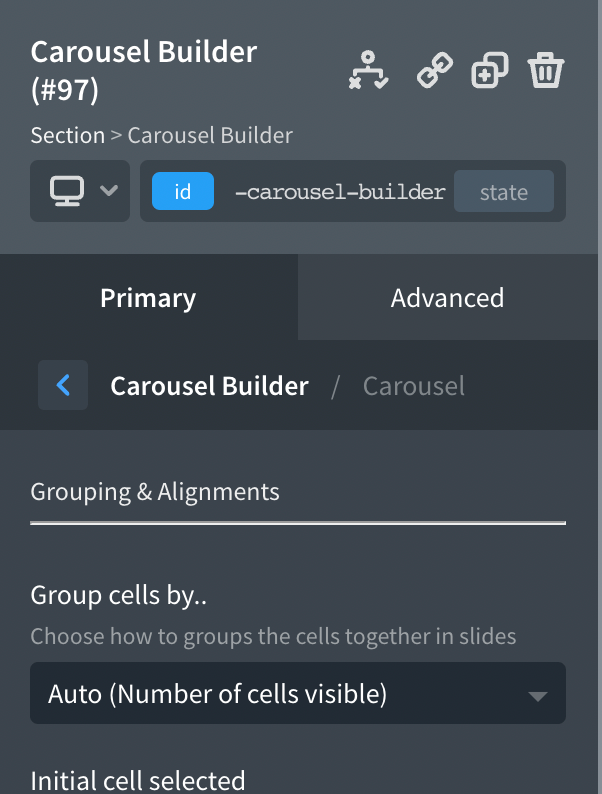
Add a Carousel Builder inside the Section.
Settings from our test page:
Add a Repeater component inside the Carousel Builder.
Set your desired query.
In our test site, it is “custom” with post Post Type and 10 Posts per page.
While it is not necessary, let’s add a Div inside the Repeater’s Div as a container for the elements that we wish to be shown for each carousel item.
In our test site, we added the post’s featured image and post title. You could link them to the post’s permalink if you wish.
Let’s add the lightbox trigger. Add a Text Link component inside the above Div (if it is NOT set as a link) or outside the above Div (if it is set as a link).
Set the link text to something like “Show more info”.
Give it a class of say, open-lightbox.
Set the URL to:
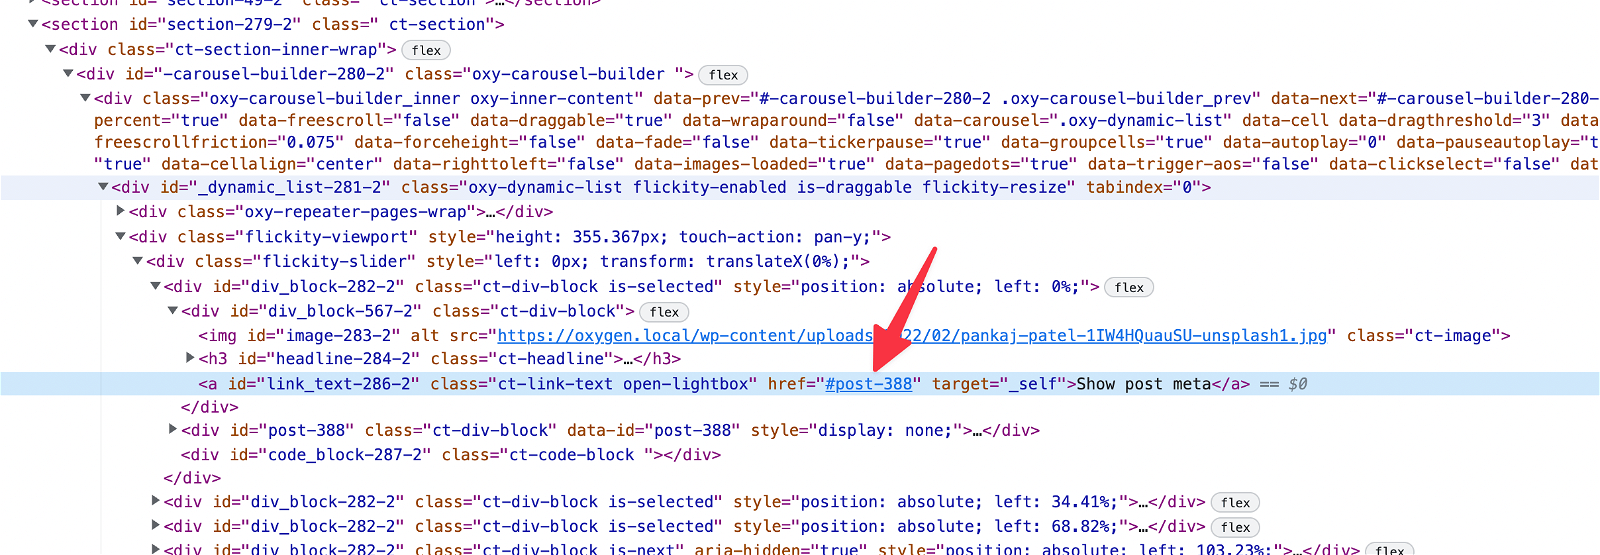
#post-[oxygen data='phpfunction' function='get_the_ID']We are setting the value of the href attribute to # followed by post- and the ID of the post.
Add a Div alongside the above Div as the container for elements that we want to appear inside the Lightbox i.e., post-specific data.
We need to have the ID of this Div to be post- followed by the post ID so that clicking the lightbox trigger will show this Div inside the Lightbox for each carousel item. Since Oxygen automatically assigns an auto-generated ID to every element, we would need to come up with a workaround to replace this auto-generated ID with the dynamic post ID in the required format.
Add the following snippet using a plugin like Code Snippets on the front-end:
Title: Dynamic post ID
Code:
<?php

function wpdd_get_post_id() {
    return 'post-' . get_the_ID();
}
Back in the Oxygen editor, select the Lightbox Content Div → Advanced → Attributes → Add Attribute.
name: data-id
value: [oxygen data='phpfunction' function='wpdd_get_post_id']
Add your desired post-specific info inside the above Div. In our test page, we added the post title and a custom field (set using ACF) value.
Let’s add a bit of jQuery that will loop through all DOM elements that have data-id attribute, then grab that attribute’s value and set it as the value of ID attribute.
Add a Code Block (this could be anywhere in the structure – we added it inside the Repeater’s Div as the last item).
PHP & HTML:
<?php
	// echo "hello world!";
?>
CSS:
body:not(.oxygen-builder-body) [data-id] {
	display: none;
}
JavaScript:
jQuery(document).ready(function($){
	if($('html').attr('ng-app') == 'CTFrontendBuilder') return;

	$('[data-id]').each(function(){
		$(this).prop('id', $(this).attr('data-id') );
	});
});
Select the Section containing the Carousel Builder and add a Lightbox component so it is at the same level as or adjacent to the Carousel Builder.
Lightbox content: Manual (using links)
Link Selector: .open-lightbox
and we are done!
Lightbox component of OxyExtras has different possible content sources one of which is “Inline (elements on current page)”.
In this article we shall see how a trigger (can be any element like a button, image etc.) can be set to open a lightbox when clicked with the lightbox content being an element that is hidden on the page.
Inline has two options:
- Display elements inside the lightbox
- Another element on page
Here we are covering the “Another element on page” option.
By the end of this tutorial your structure should be like this:
In the Oxygen editor, add a Section.
Add a Div. This is the container that holds the lightbox content.
In this example, you can add Heading and Text components.
Under Advanced → Layout, set the Display to none.
Add a Lightbox at the same level as the earlier Div.
Lightbox content: Inline (elements on current page)
Inline content: Another element on page
Element selector: (ID or class of the hidden Div)

Add a button or image or any other component that you wish to use as the trigger that should launch the lightbox.
That’s it.
WPGridBuilder has recently added further support for Oxygen by adding some new components for adding both Facet’s & Grids. It means we no longer need to add shortcodes and makes it a bit more convenient to work when inside the builder, especially when using together with Repeaters or Easy Posts.
WPGridBuilder with Repeaters
If you’re using a repeater for your posts and using WPGridBuilder to filter and add more posts, one thing you may notice is that if you’re adding some dynamic Oxygen components that use JS inside of the repeater or are adding your own with code blocks, the new content that is appended onto the page may not pick up the same functionality. You may need to adapt your code slightly to account for new elements that didn’t exist on the page when the page first loaded.
This is the case with both the Lightbox & the Read More / Less components.
WPGridBuilder documentation provides JS events that trigger when specific things occur. We can use the event ‘appended’ to listen for when the facets have been used to append new content inside the repeater and make surer these components function as they’re supposed to.
Support for Lightboxes & Read More components
You can add the following code to a code block. (Make sure the code block isn’t actually inside of the repeater that WPGridBuilder is using)..
window.WP_Grid_Builder && WP_Grid_Builder.on( 'init', onInit );

function onInit( wpgb ) {
    wpgb.facets.on( 'appended', onAppended );
}

function onAppended( content ) {

    /* Lightbox */
    if (typeof doExtrasLightbox == 'function') {
    	doExtrasLightbox(jQuery(content));
    }

    /* Read More / Less */
    if (typeof doExtrasReadmore == 'function') {
    	doExtrasReadmore(jQuery(content));
    }
}
Should this just be built-in?
If WPGridbuilder starts to gain a lot of popularity for OxyExtras users (they’re currently offering Oxygen users a discount for their LTD), it may be a good idea in the future to add support for it out of the box. For now, as there are a few different methods for adding Oxygen components to a page dynamically, the priority was to make sure there was a way to use these components in AJAX loaded content regardless of which method you’re using.
These two new functions doExtrasLightbox($content) and doExtrasReadmore($content) provide a way to do that. You just need to pass the new AJAX-loaded content as the parameter ($content).
doExtrasLightbox(jQuery('.my-new-content'));Where you add this will depend on the plugin you’re using to add the content, you’d need to refer to the plugin documentation.
Note – if you’re using our own Infinite Scroller component, then this is already working out of the box.